Wiper Repair - Servicing
I did this how-to back around 2006 on the NWDE forum. It nearly got lost, but thanks to Dave Gonzales for archiving it on his site. If you want to check out Dave's archive, you can find it here. This info is based on a '71 Datsun 510 wagon, but there are similarities shared with many other cars.
My wipers have been starting to squeak almost constantly, so I thought I'd finally dive in and service them. You can bet that most of these cars have not had them serviced in the last 30+ years. I'm not looking to start a big discussion, this is mainly for the archives to help anyone looking for wiper repair info.
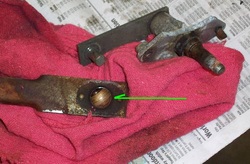
This is simply what I did. It may not be the most correct way, the fast or the simplest....it's just what I did and I thought I'd take a couple of pics while I did it. I'm sure there's a bunch of owners out there that have never ventured into the wipers. Green lines will point to what the comments are describing.
This is simply what I did. It may not be the most correct way, the fast or the simplest....it's just what I did and I thought I'd take a couple of pics while I did it. I'm sure there's a bunch of owners out there that have never ventured into the wipers. Green lines will point to what the comments are describing.
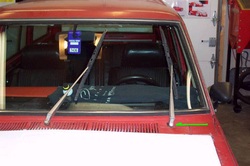
You can see that there was some previous damage to the driver's side wiper shaft. Another reason to tear into this system.
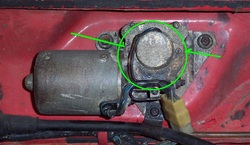
The manuals will tell you this too. You can loosen the two hold down clamps and rotate the "auto stop switch". Counterclockwise if it "parks" too early.
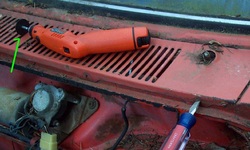
If you have rusted/stripped screws(this is on a different 510) you can
use a dremel cutoff wheel and put a slice in the head, about the same
depth as the phillips hole was. Then pushing in hard, use a flat blade
to get it out. You can also turn it clockwise slighty to break the
screw free, then it will usually come out a lot easier.
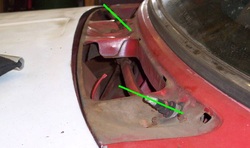
You can see the damage and how the angle of the shaft is way off.
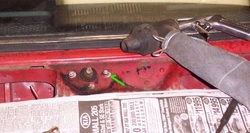
After fighting with the PB Blaster and working the nuts back and forth for about 5 min each on the drivers piece(and one still broke anyway)...I pulled out the spot blaster and knocked the rust off the threads. Small wire brush would have probably worked too. More PB and they came off a lot easier.
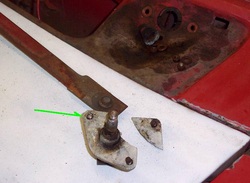
The housing is rotated from it's mounted position, but you can see the bolt I broke and the mounting ear that had been busted off from previous damage. I could have taken this part off the parts car, but I figured it's been running for years with the ear broken off....so I reused this one for now.
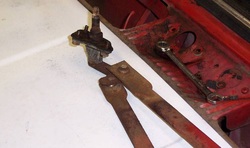
Passenger side shaft assy.
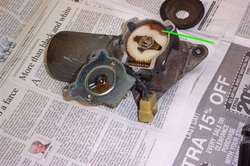
Rather than trying to clean all the old grease out, I simply took the extra and redistributed it to places it was needed. I didn't want to mix grease types and I didn't want to use something that would react with the plastic. Better safe than sorry....I used it's own grease.
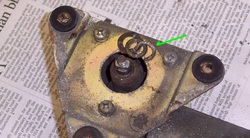
There is a horseshoe clamp holding the shaft in and a couple of washers. One of them is a spring washer to make sure you put a bit of grease on it when it goes back together.

With the clamp on the backside removed, the shaft/gear will slide out....except that this bolt is in the way. I really didn't want to take the motor apart just to get this shaft/gear out.
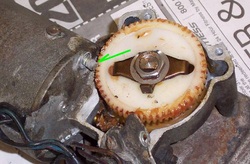
I found that if I took the nut/washer off the bolt, there was some play to work with. I like up a notch in the gear tooth with the bolt and a gentle bit of prying got the gear past the bolt. You could also file/grind the bolt down to make it flush with the nut before you take it off to get more clearance.
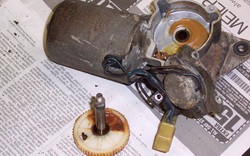
More grease to redistribute. You might be able to see how the shaft is brown and gunked up. Old dried up grease...almost sticky like gum. Put some brake cleaner on a rag and get that cleaned off. I also hit it with a bit of scotch brite. I didn't put it on the wire wheel because I didn't want to damage the plastic gear or grease up my wheel. Use the rag/cleaner and a dowel or screwdriver to clean the bushings that this shaft rides in.
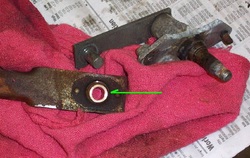
The next two pics show the "ball joints" at the ends of the arms. I sprayed cleaner in these and worked them around until they were freed up again. The bronze(seemed a bit hard to be brass) is a self lubricating metal(but the steel it rides in rusted) so you could actually just spray in some PB Blaster or WD40, get them loose again and call it good. I wanted them clean enough that I could put some grease in them, so I actually hit them with the wire wheel too.
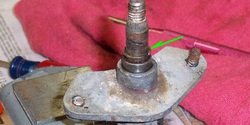
There is a "C" clip holding the shaft in the housing. Would be a lot easier to get out if it were an "E" clip, but oh well. I used two small 1/8" flat blade screwdrivers to gently push apart at the gap. You have to kinda twist one side up to get it out of the groove, then work the screwdriver around the shaft, twisting it to move the clip out of the slot. They make some nice pliers to spread these babies, but I don't have them. That will change!
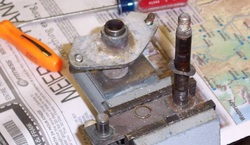
Just look at that nice pretty shaft! NOT! Hmm...so why was it squeaking?!! There is actually wear on the steel shaft because of rust. The bronze doesn't rust, but the shaft does. Good reason to service them more than just once every 30 yrs! Another spring washer to keep track of. I wire wheeled the shaft. Scotchbrite/brake clean these parts too, then use some fresh wheel bearing grease to lube them up and put them back together.
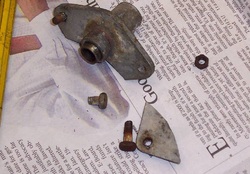
As my luck(as in bad luck) would have it, I broke a bolt on the good ear. So, I pressed the bad one out of the good ear and the good one out of the bad ear. Then just taped the good one into the good ear.
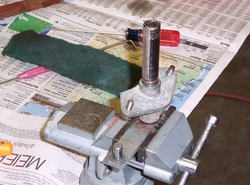
10mm deep well(1/4" drive) worked great for pushing the "C" clip back down the shaft to the slot. Don't forget to put the spring washer under the housing before you put it on the shaft.
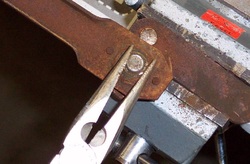
There's several of these horseshoe clamps to take off. I used needle nose pliers. One side on the shaft, one on the ends of the clamps. Rotate the pliers a bit to push the ends in.
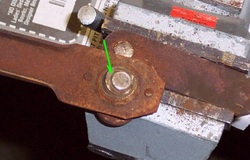
This will open up a small gap. Put a scribe or small screwdriver in here and pry slightly. You don't want to pry too much or you'll open up the clamp more than necassary. Once you've pried it just a bit, you can push it back on some and it should lift off the shaft. If you bend it, tap it with a hammer on a flat surface and get it flat again before you try to put it back in.
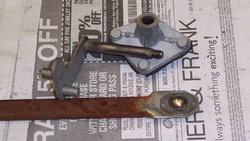
Between the sandblaster and the wire wheel, they cleaned up pretty quick and easy.
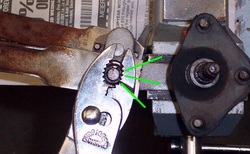
When putting the horseshoe clamp back on, I used a regular pair of slip joint pliers. The 3 lines show the 3 angles that I squeezed it at. The pictured angle first, then the other two to make sure the ends are squeezed in.
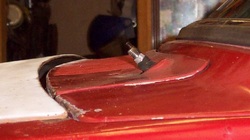
Back together and you can see the shafts line up almost perfectly. Of course I got to spend a couple of min with the hammer and dolly to flatten out the damage to the cowl before I bolted the wiper stuff back in.
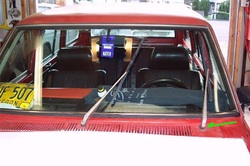
Compare this to the first pic and you can see the difference in the shaft placement.
Okay, now that we've gotten the wiper drive system working, we can pay some attention to the wiper blades themselves. If you'd like to check out that info, head to the Wiper Blade - Replacing page.
