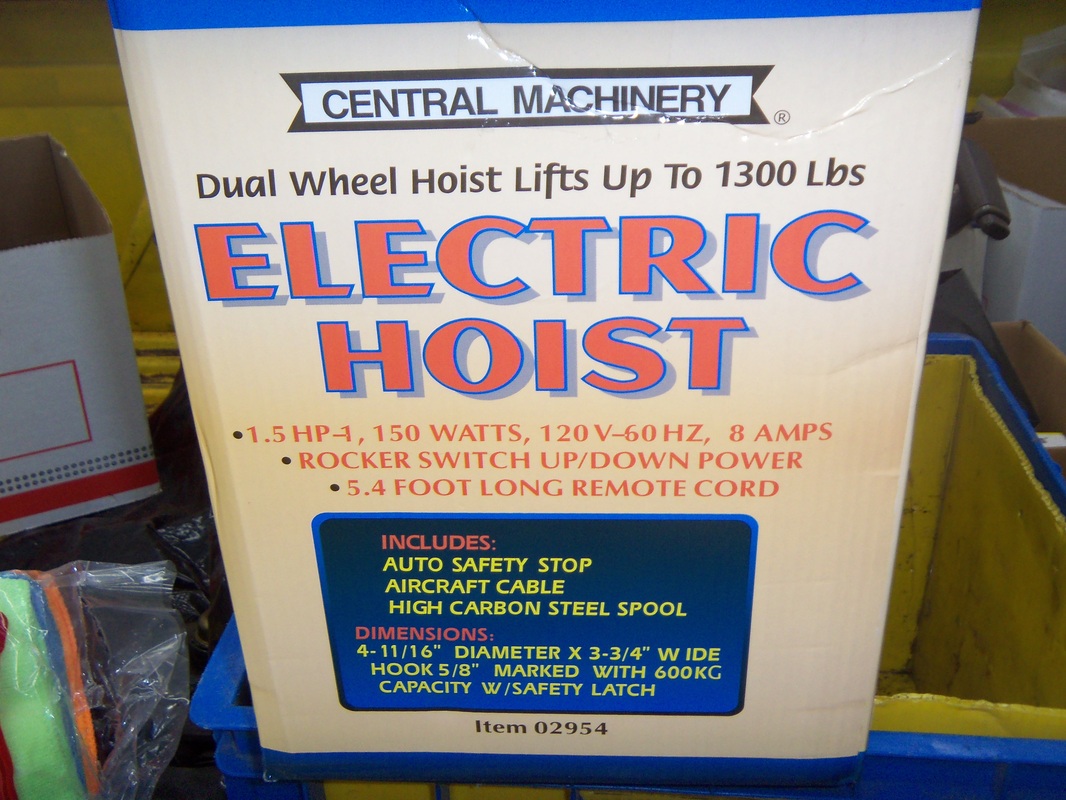
HF Electric Hoist on HF Trolley
I'm not an engineer, so I take no responsibility for any of this being safe. Double check everything and use your information and judgement. This is simply how I did it and I share it so that it might give someone else some ideas on how to mount their hoist.
I've been eyeballing these hoists for a few years now. I almost bought one when I put the trolley on the beam, but I could not find or figure out anyway to mount the hoist to it. Plus, I didn't really have the money at the time. I sold a brake kit and had a couple of dollars to burn. I was supposed to put it toward a chipper/shredder, but I figured I could use a pair of shears to make the branches smaller, so that opened the door to getting the hoist. Anyway.....
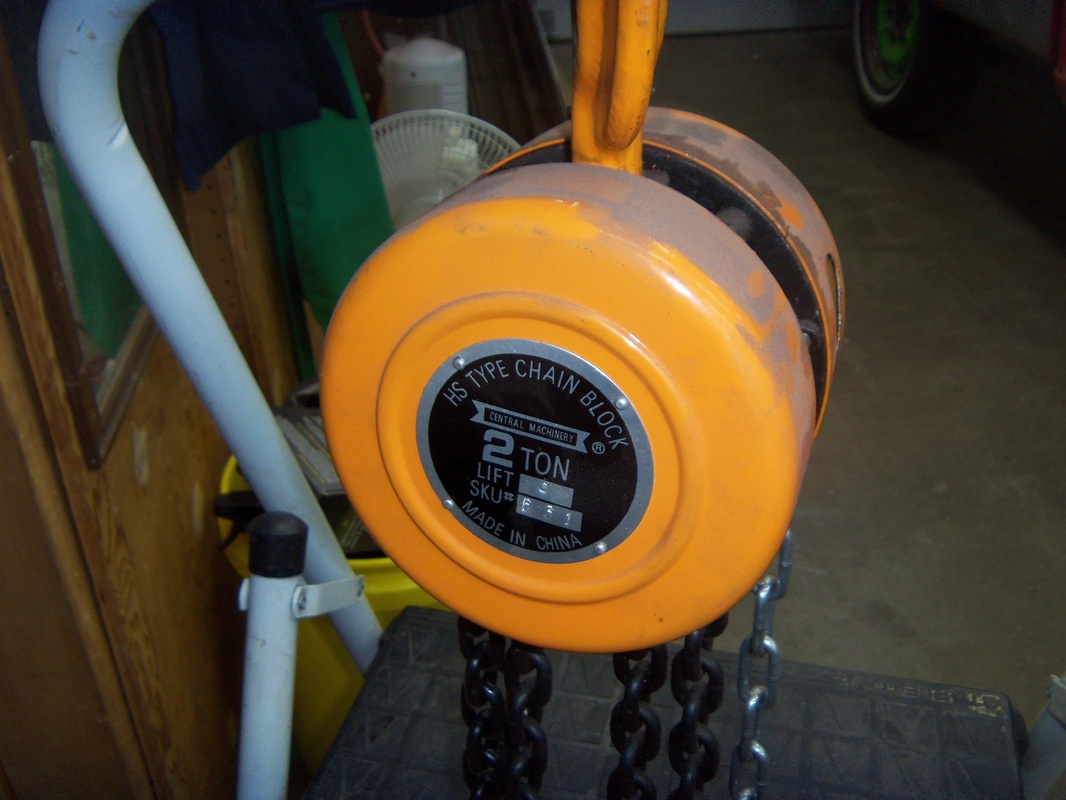
Here's the hoist, the trolley and the chain hoist I'm replacing. The chain hoist works fine, but it's really slow, which certainly has it's advantages. I didn't have a chain bag/bucket for the excess chain, so it was always getting in the way.
Here's the hoist, the trolley and the chain hoist I'm replacing. The chain hoist works fine, but it's really slow, which certainly has it's advantages. I didn't have a chain bag/bucket for the excess chain, so it was always getting in the way.
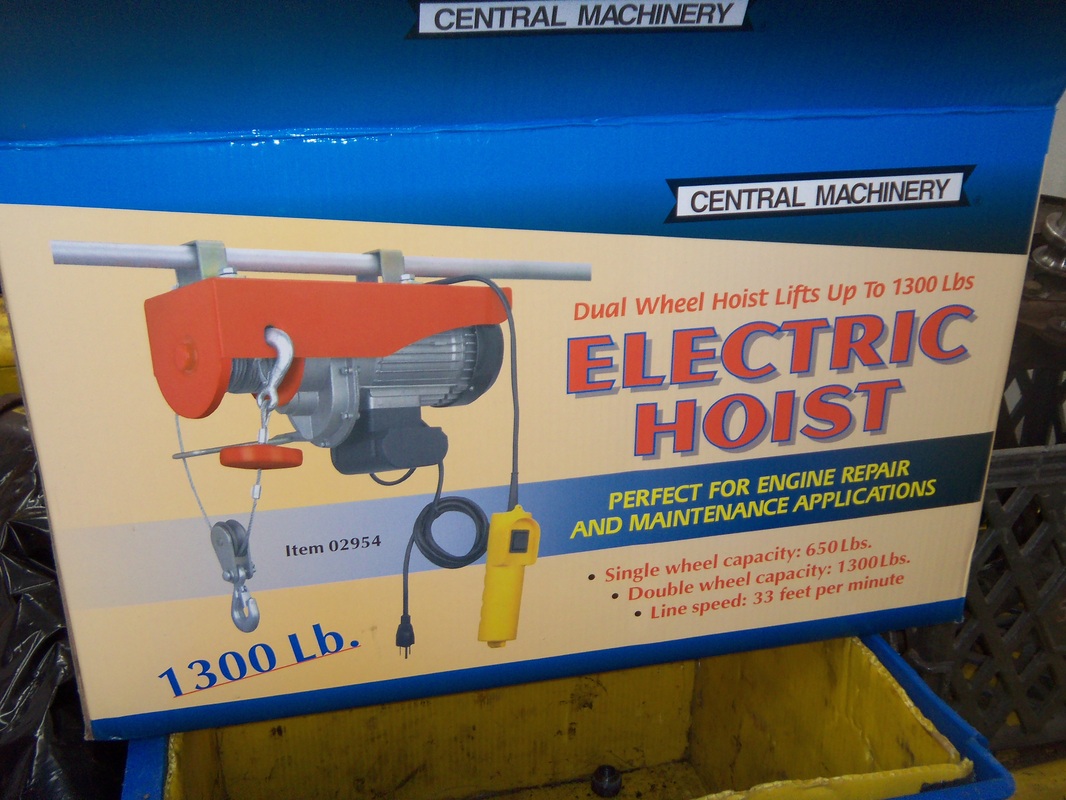

I spent several hours looking for any other examples of this hoist mounted to this trolley, or anything similar. No luck. I decided to get the hoist anyway. I figured I could take it back if I just couldn't figure out how to do it. When it rang up at $143 with the 20% coupon, I felt even better. The normal list price is $199 and you can usually find them on sale for $179. I didn't think the coupon would come off the sale price, but it did.....sweet!
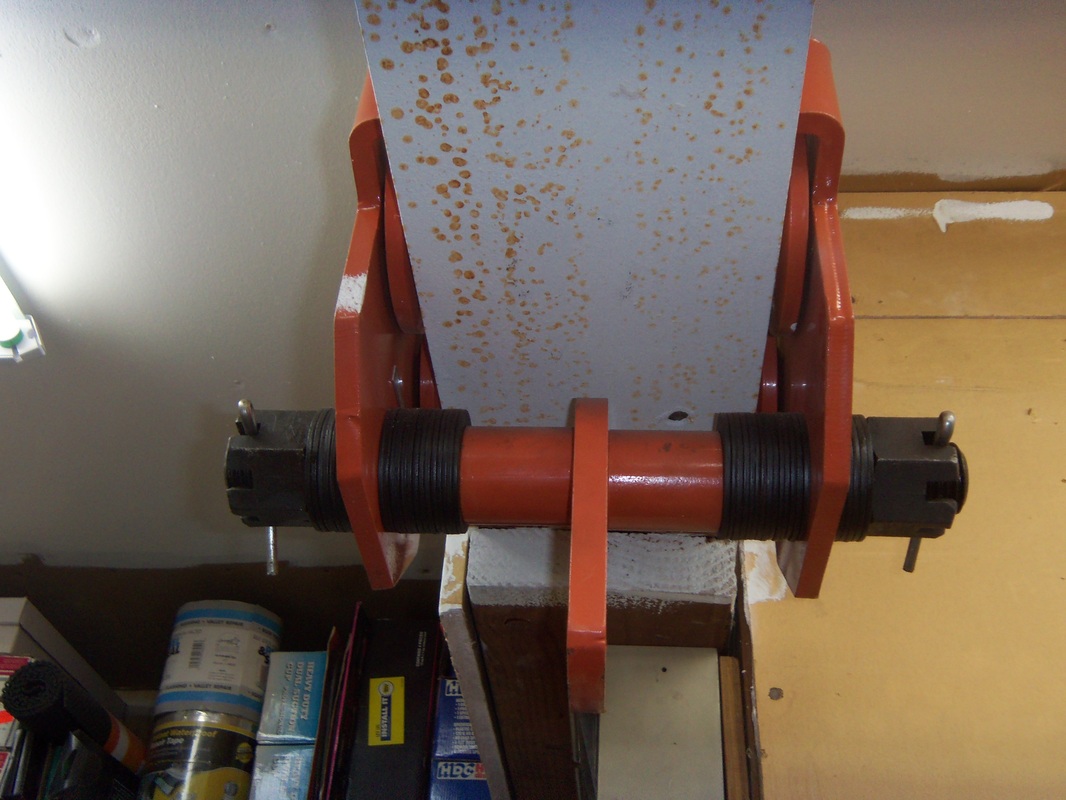
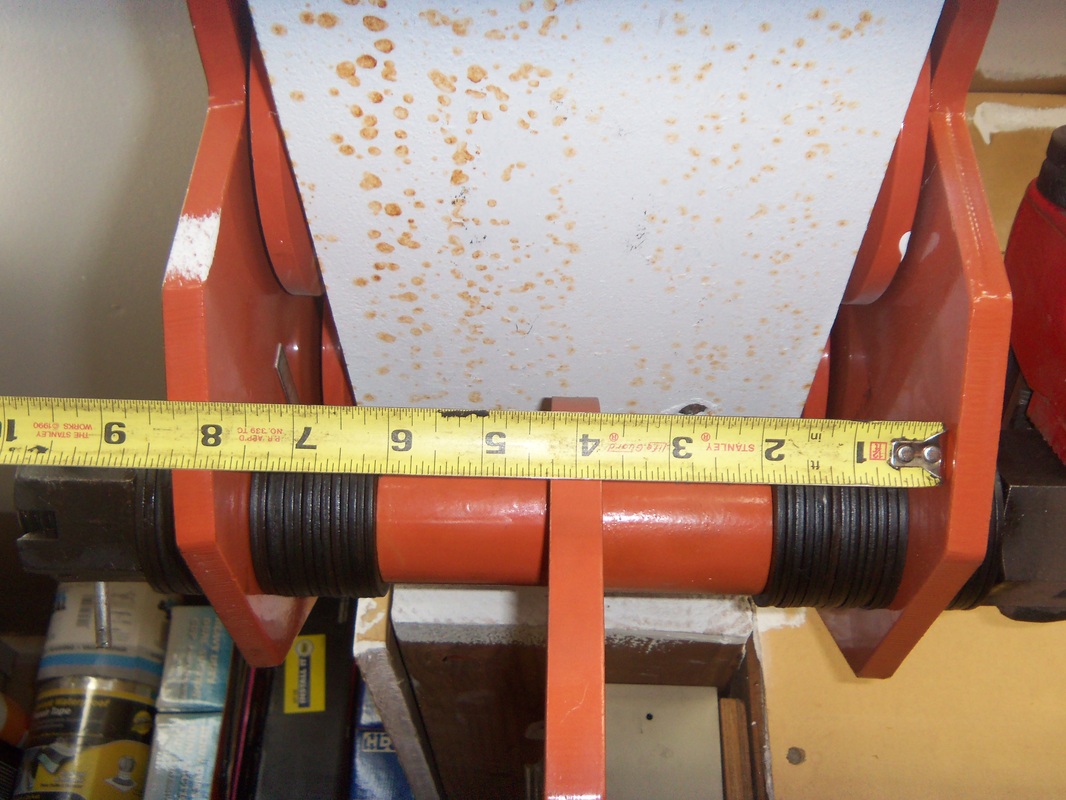
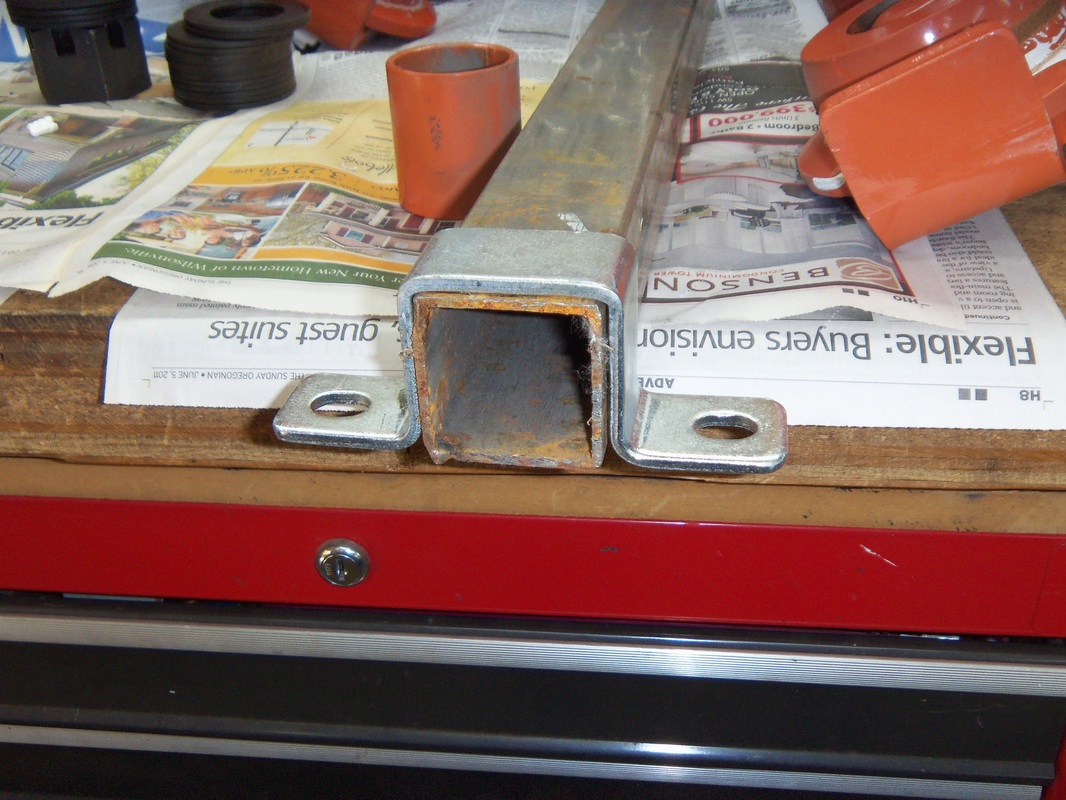
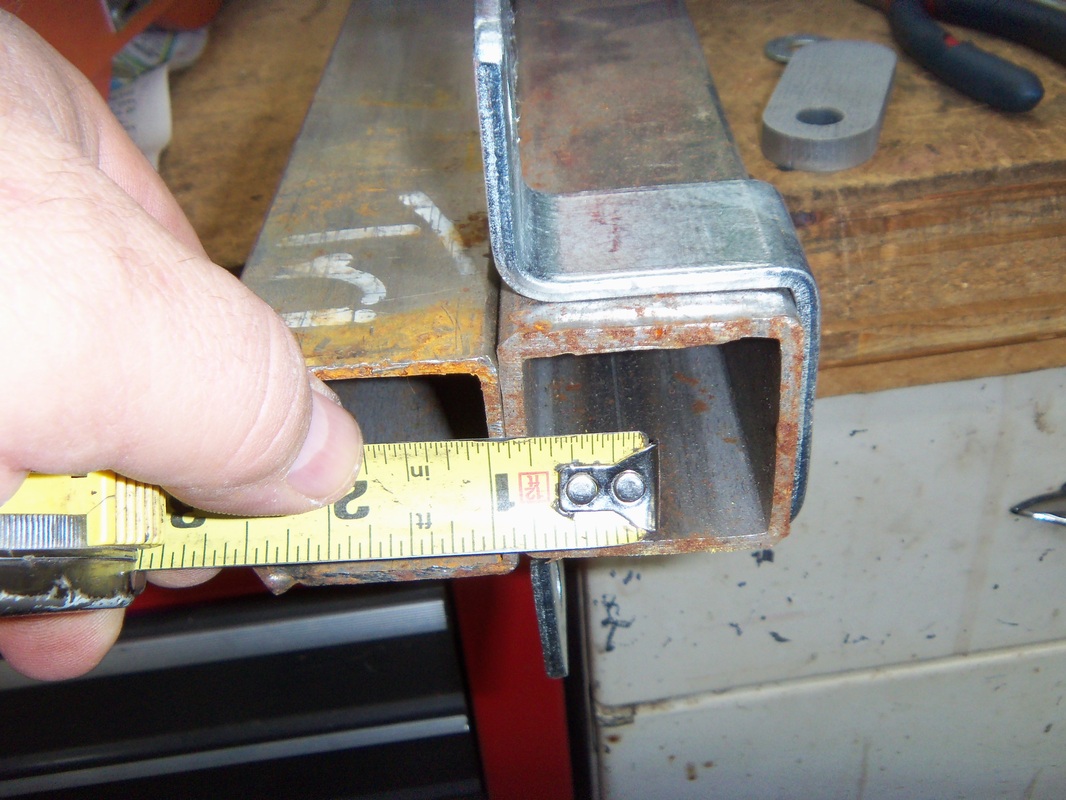
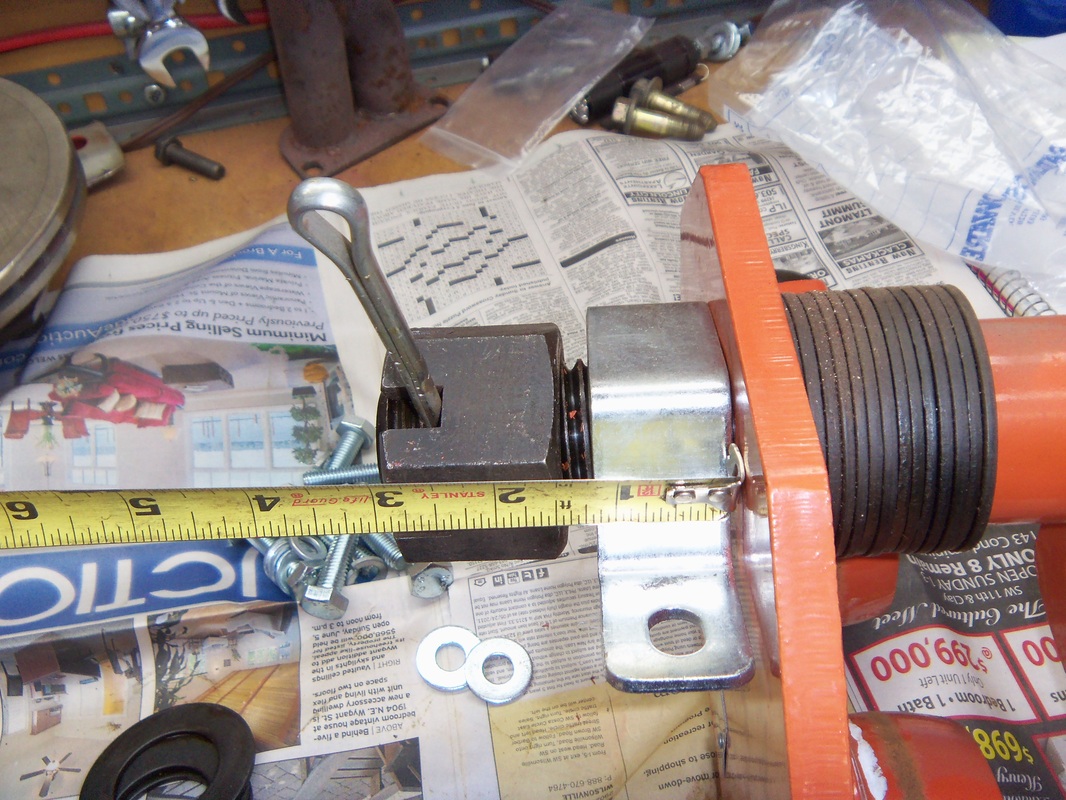
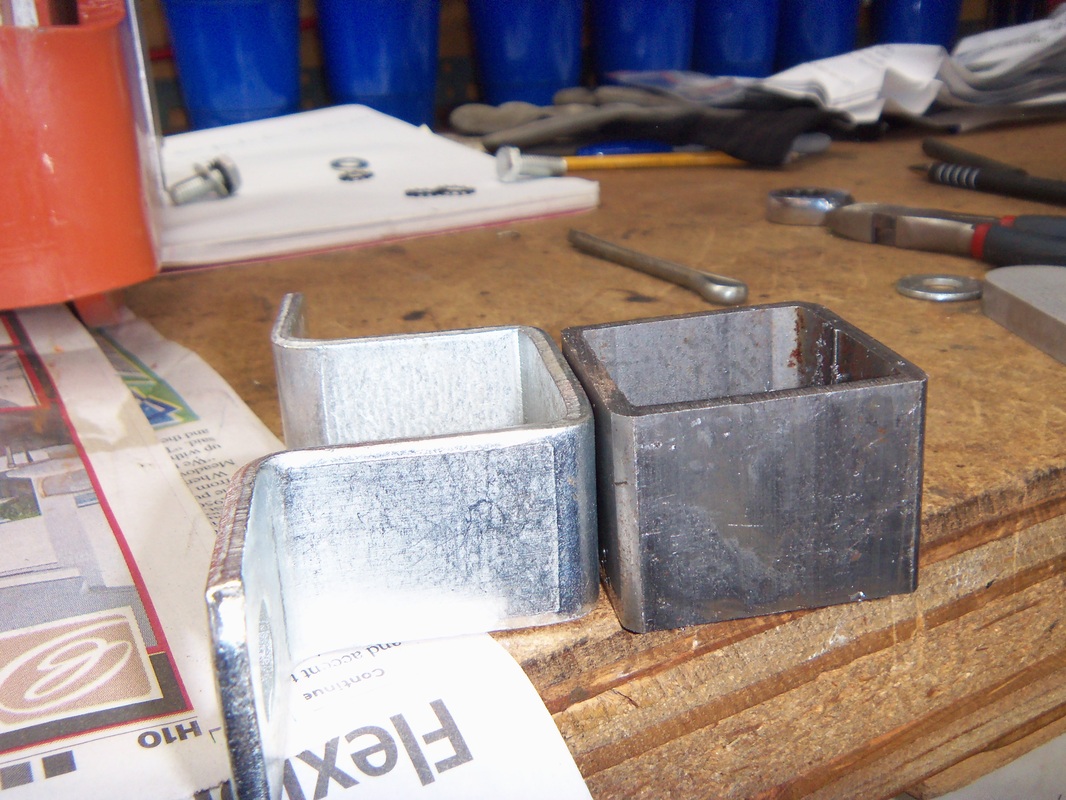
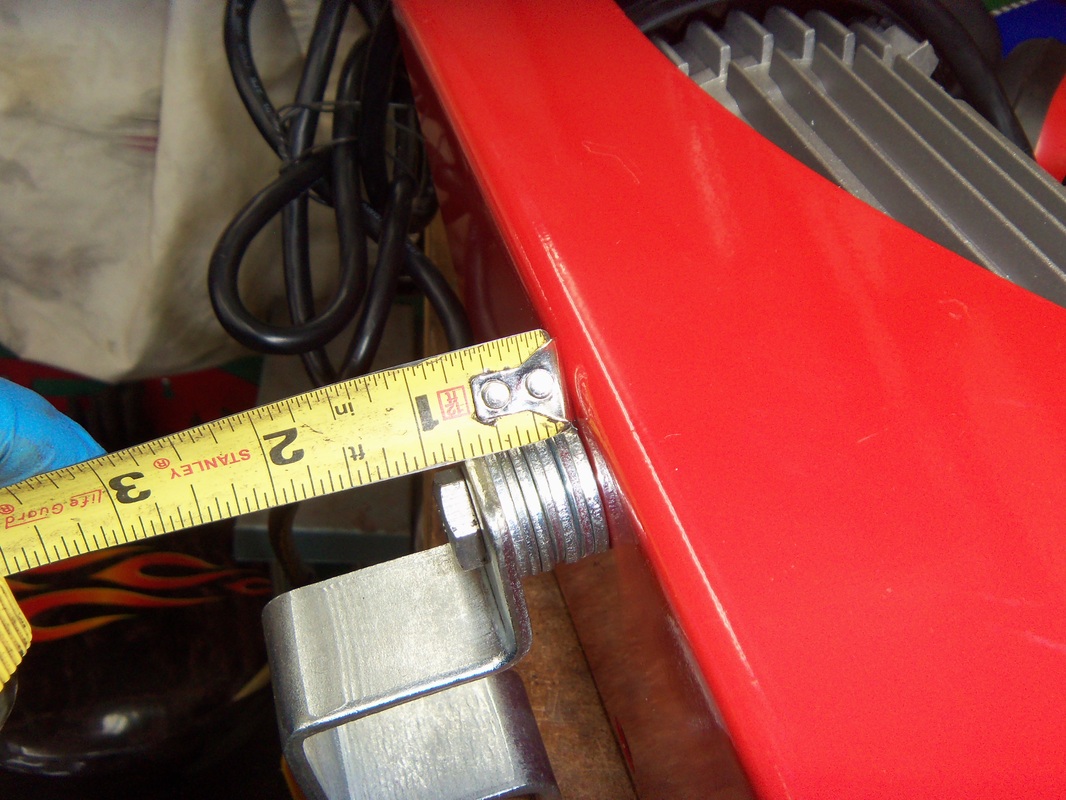
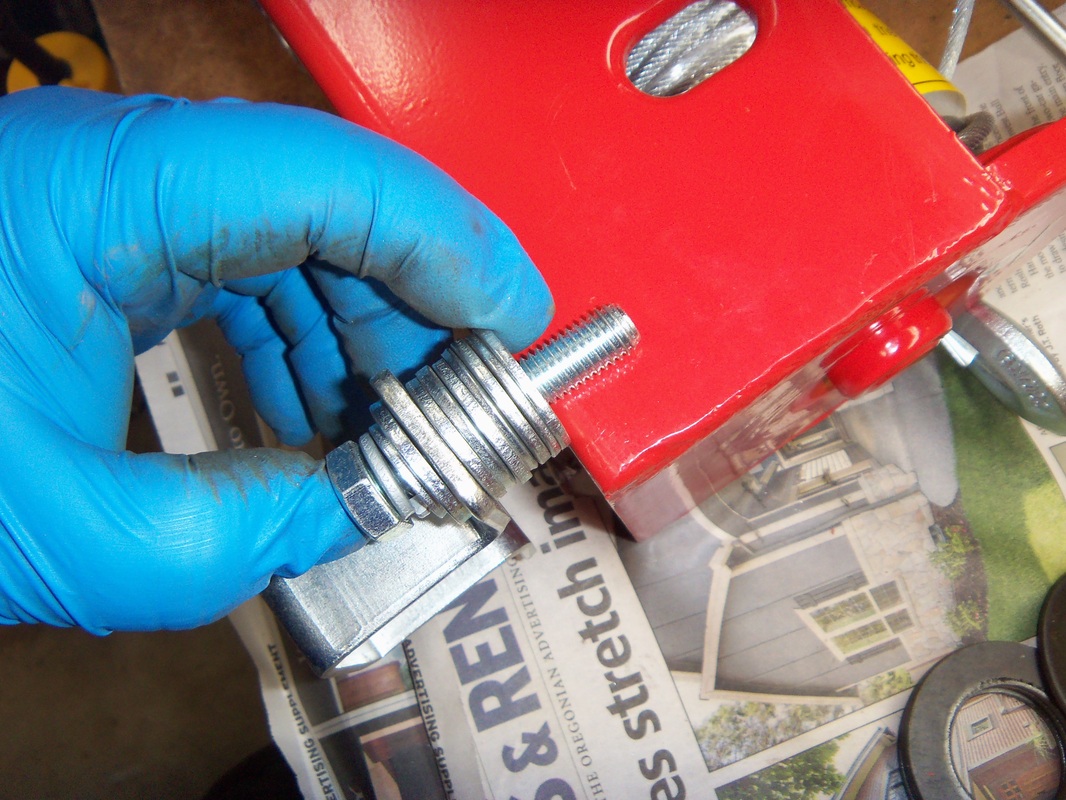
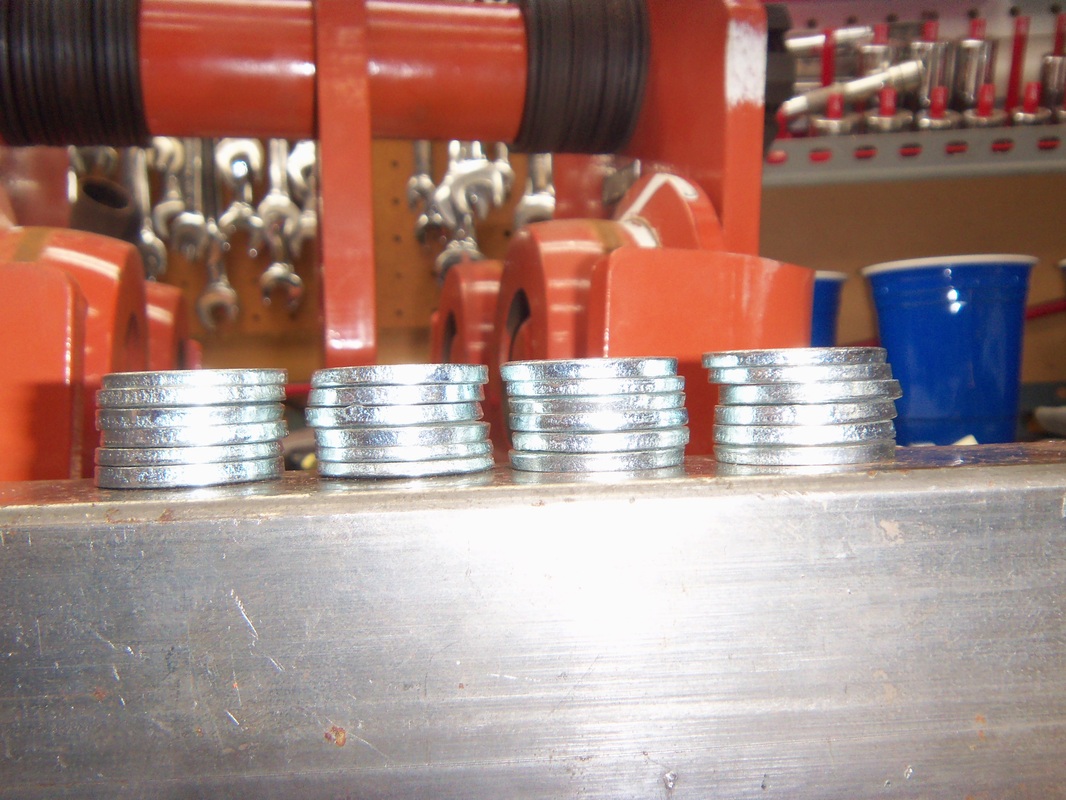
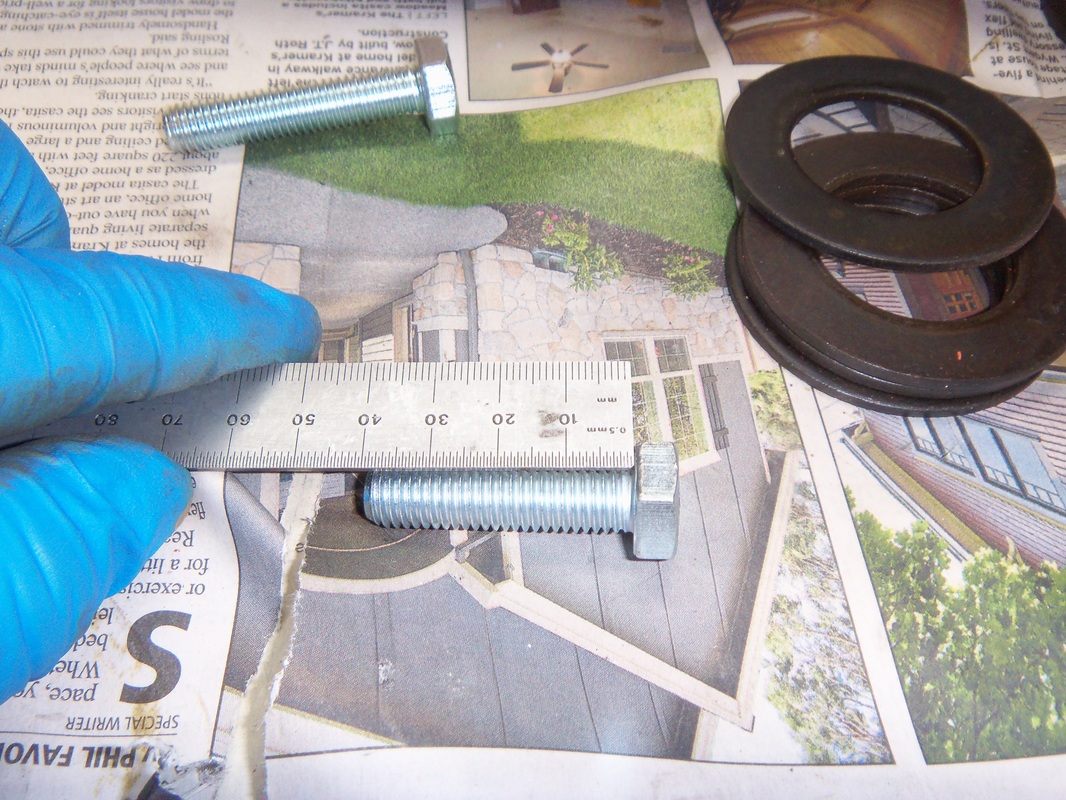
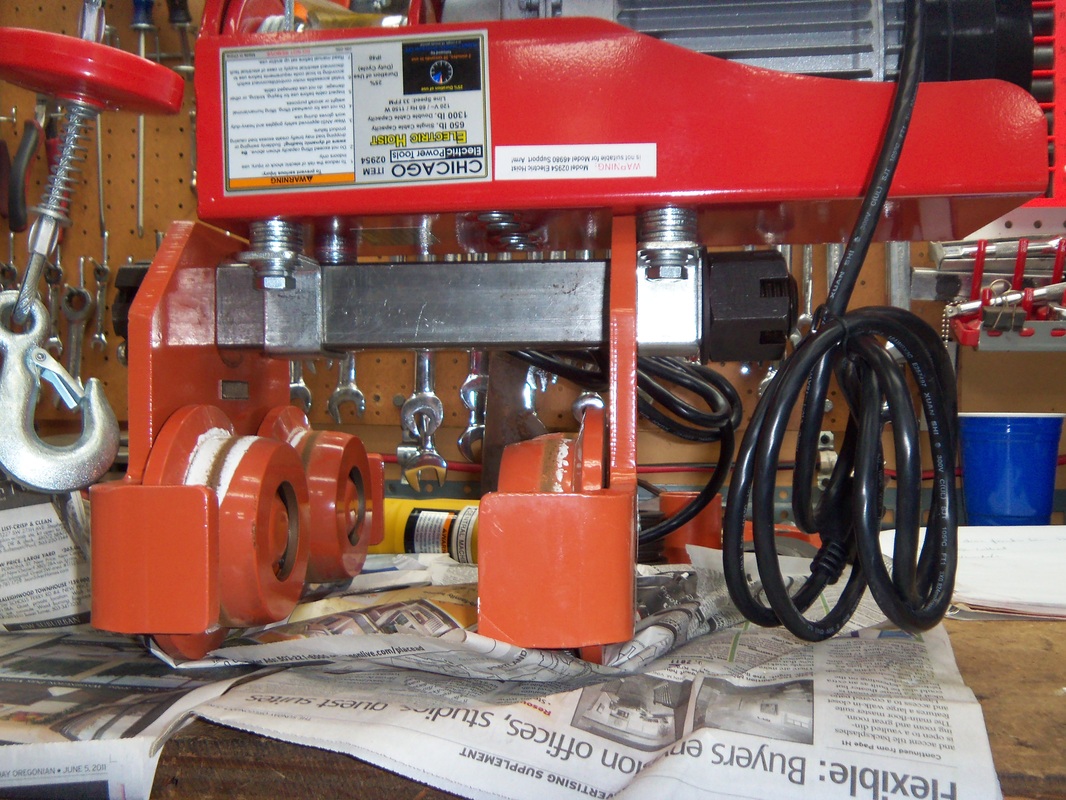
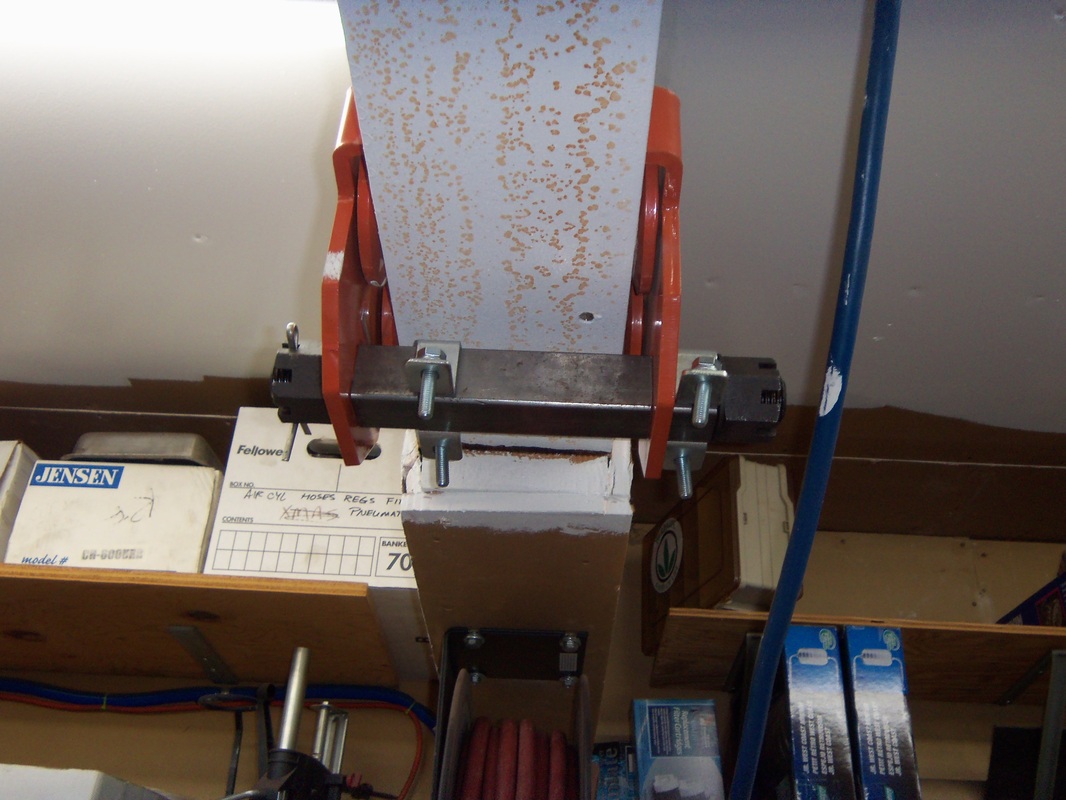
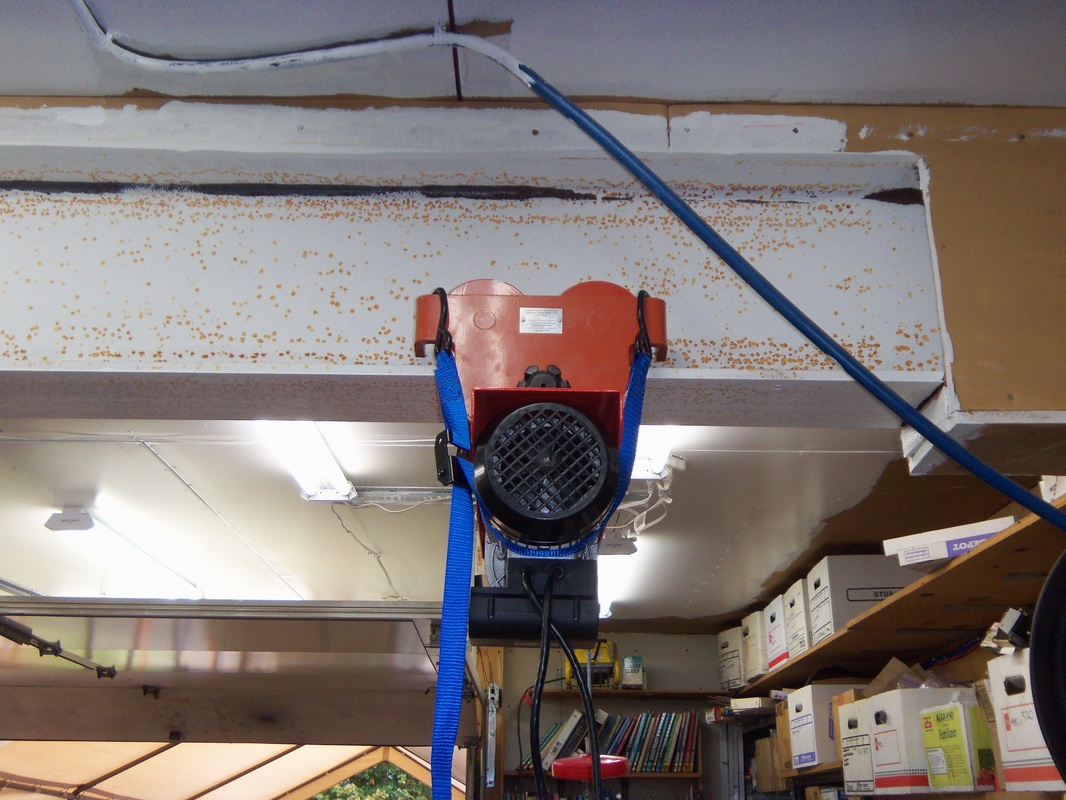
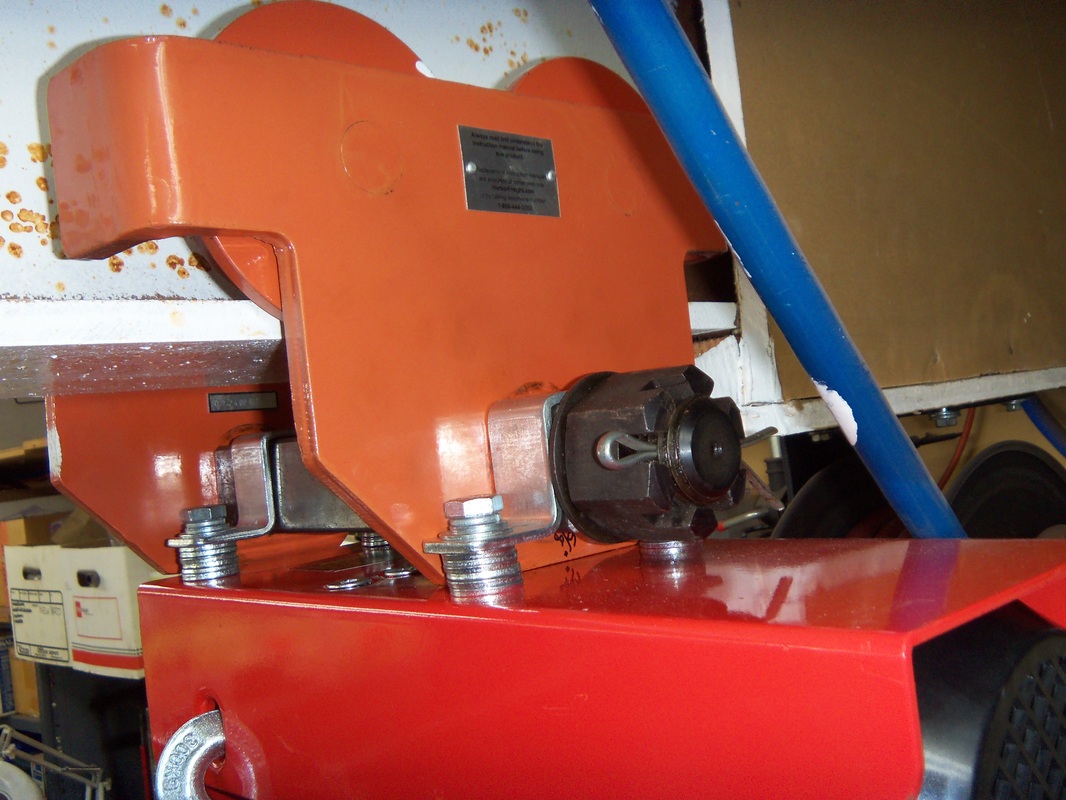
I had been thinking of ways to weld plates onto the sides of the trolley for mounting, but finally, the gray matter had a small spark and this is what I came up with. If I could replace all of the spacers and washers with 1-3/4" sq tubing, I could suspend the hoist with the included brackets. I thought about just rearranging the tube spacers, but the were 2" and would not fit inside the brackets. I found two pieces of 1-3/4" sq tubing and chose the one with the thicker wall. It still fit over the main bolt just fine. Because of the spacing of the trolley plates, I found it necessary to offset the hoist just a bit. I would have liked to have gotten the cable spool in the center of the beam/trolley, but I think this will hold up just fine. I think the pictures will explain the need and use of the washers well enough. The first bolt shown with the washers is a M10x1.50x50mm which was a bit long. Luckily, when I was at the hardware store, I decided to pick up two different lengths just in case. I opted for the 40mm long bolts. The bolts that came with the hoist are grade 8.8, which in metric is the equivalent to a grade 5 SAE. I purchased bolts with a 10.9 rating, which equates to grade 8 SAE. I felt more comfortable with the 10.9 rating, but you can make your own judgement call on that. The short piece of tubing is cut about 1/8" longer than the width of the hoist bracket. That way, if I ever need to remove the hoist, I will not have to loosen up the main bolt on the trolley. I also checked to make sure that each stack of washers were equal in height. No point in having any twist in the setup. I was going to turn some spacers on the lathe, but my buddy likes gives me a hard time about using the lathe for every project, so I thought I'd just use the washers. Saved me about at least a half hour....thanks Dave! :)
I had been thinking of ways to weld plates onto the sides of the trolley for mounting, but finally, the gray matter had a small spark and this is what I came up with. If I could replace all of the spacers and washers with 1-3/4" sq tubing, I could suspend the hoist with the included brackets. I thought about just rearranging the tube spacers, but the were 2" and would not fit inside the brackets. I found two pieces of 1-3/4" sq tubing and chose the one with the thicker wall. It still fit over the main bolt just fine. Because of the spacing of the trolley plates, I found it necessary to offset the hoist just a bit. I would have liked to have gotten the cable spool in the center of the beam/trolley, but I think this will hold up just fine. I think the pictures will explain the need and use of the washers well enough. The first bolt shown with the washers is a M10x1.50x50mm which was a bit long. Luckily, when I was at the hardware store, I decided to pick up two different lengths just in case. I opted for the 40mm long bolts. The bolts that came with the hoist are grade 8.8, which in metric is the equivalent to a grade 5 SAE. I purchased bolts with a 10.9 rating, which equates to grade 8 SAE. I felt more comfortable with the 10.9 rating, but you can make your own judgement call on that. The short piece of tubing is cut about 1/8" longer than the width of the hoist bracket. That way, if I ever need to remove the hoist, I will not have to loosen up the main bolt on the trolley. I also checked to make sure that each stack of washers were equal in height. No point in having any twist in the setup. I was going to turn some spacers on the lathe, but my buddy likes gives me a hard time about using the lathe for every project, so I thought I'd just use the washers. Saved me about at least a half hour....thanks Dave! :)

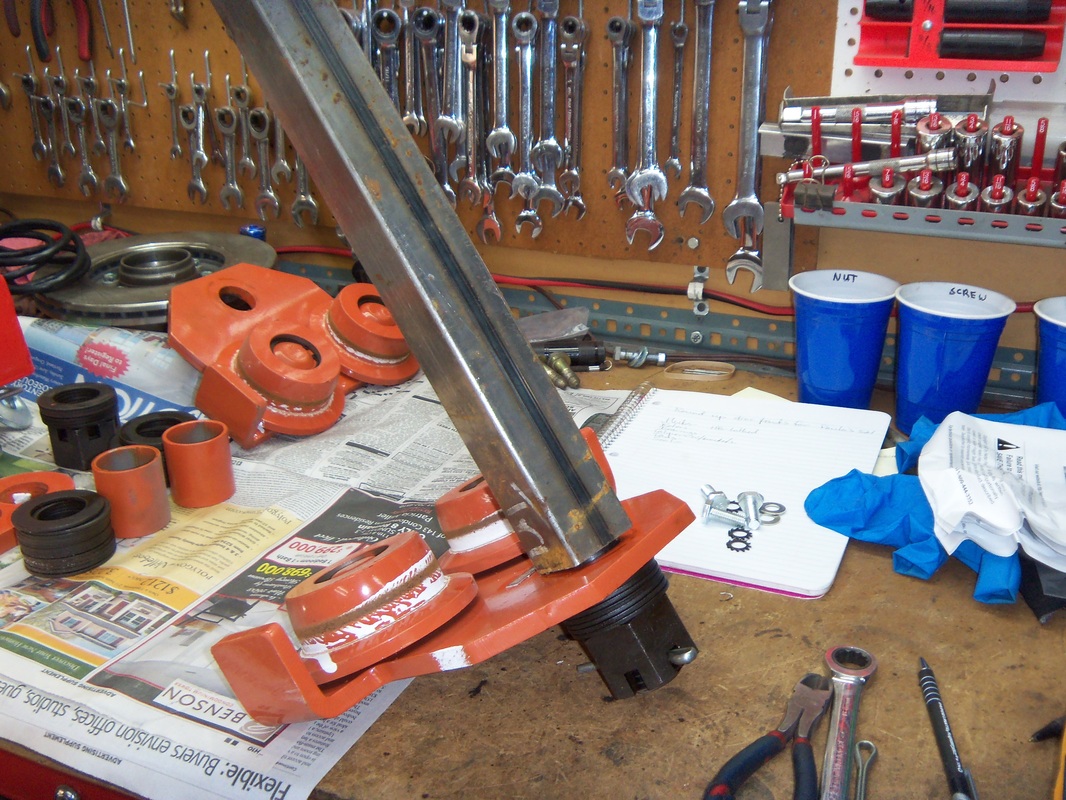
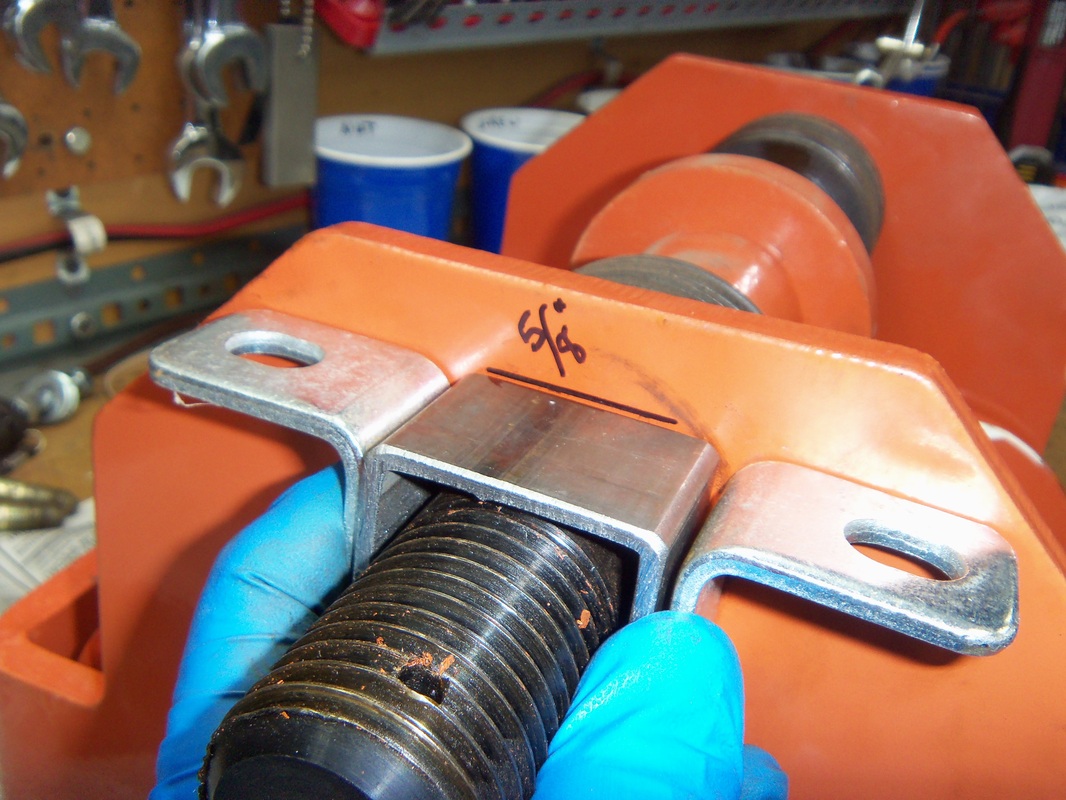
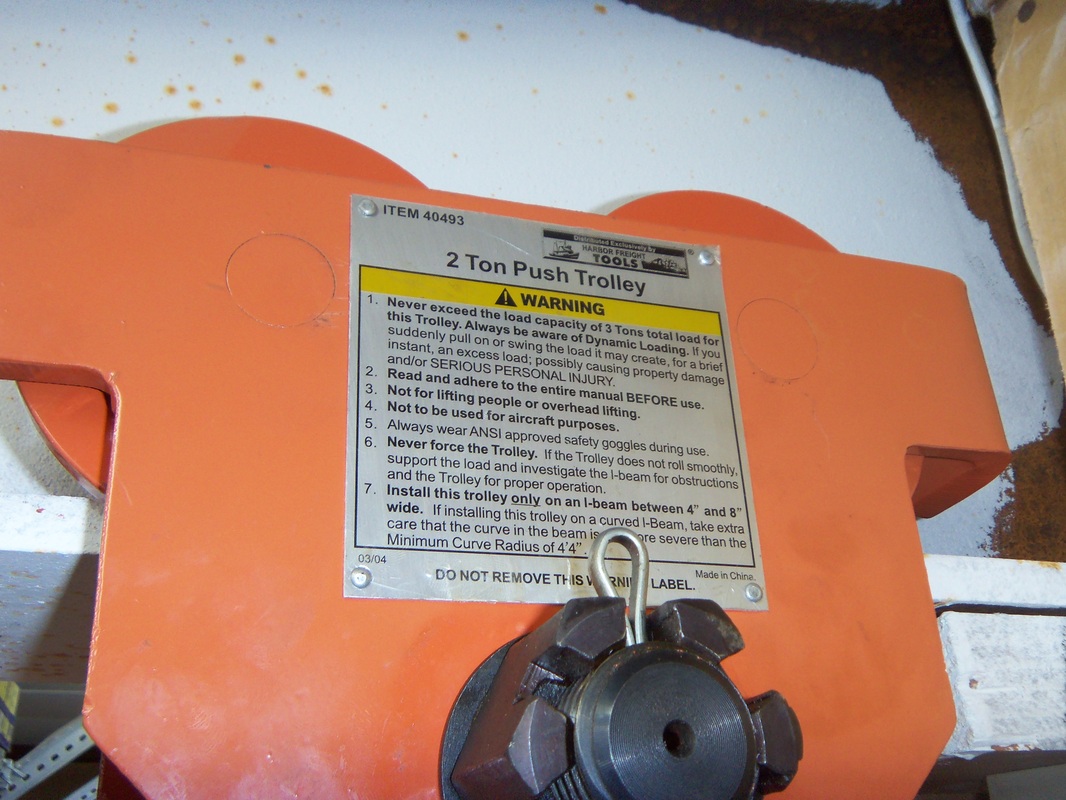
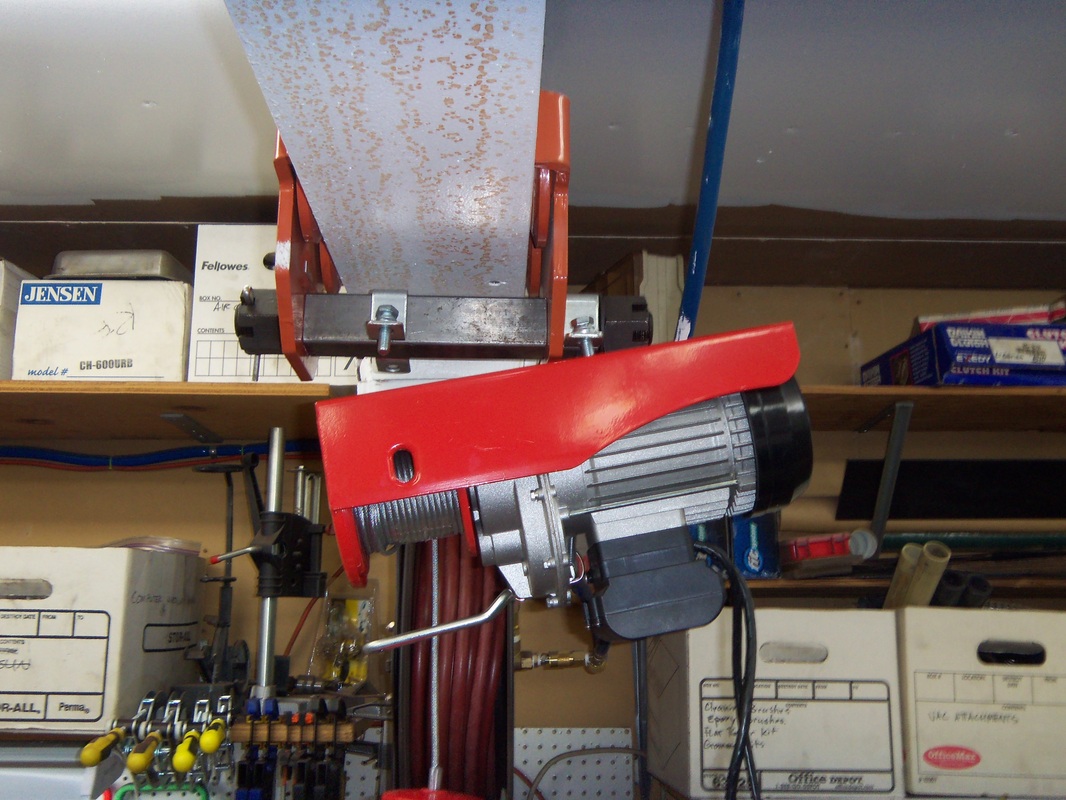
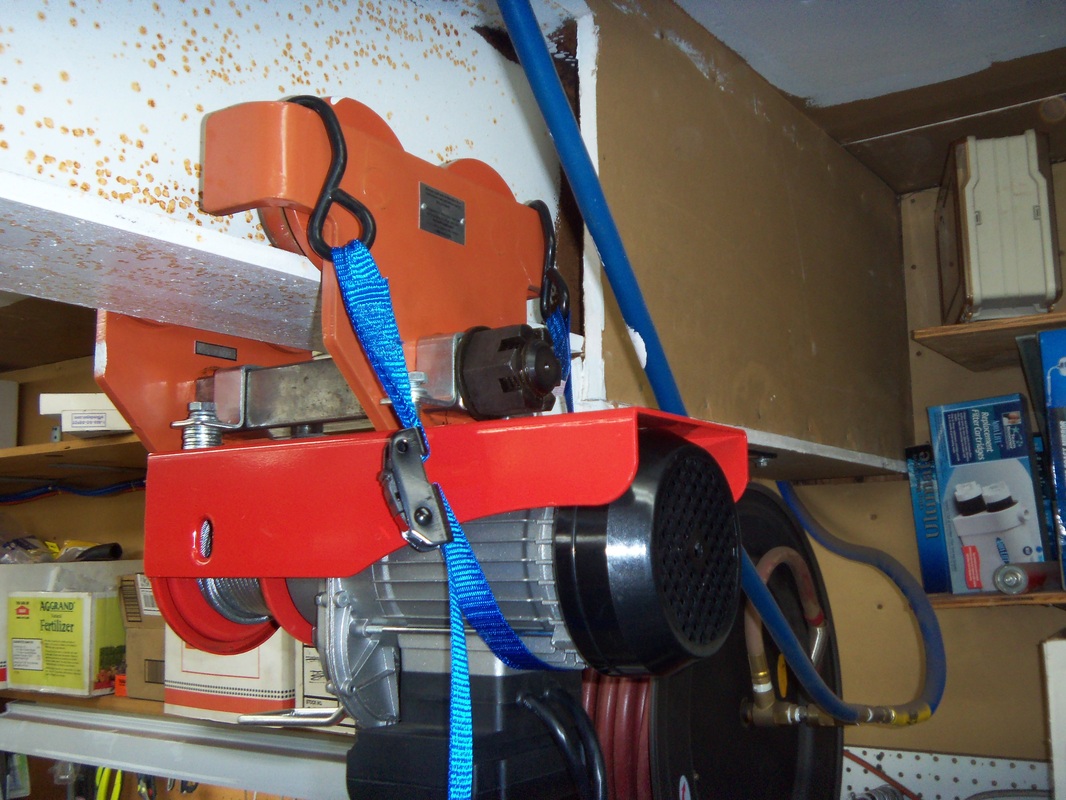
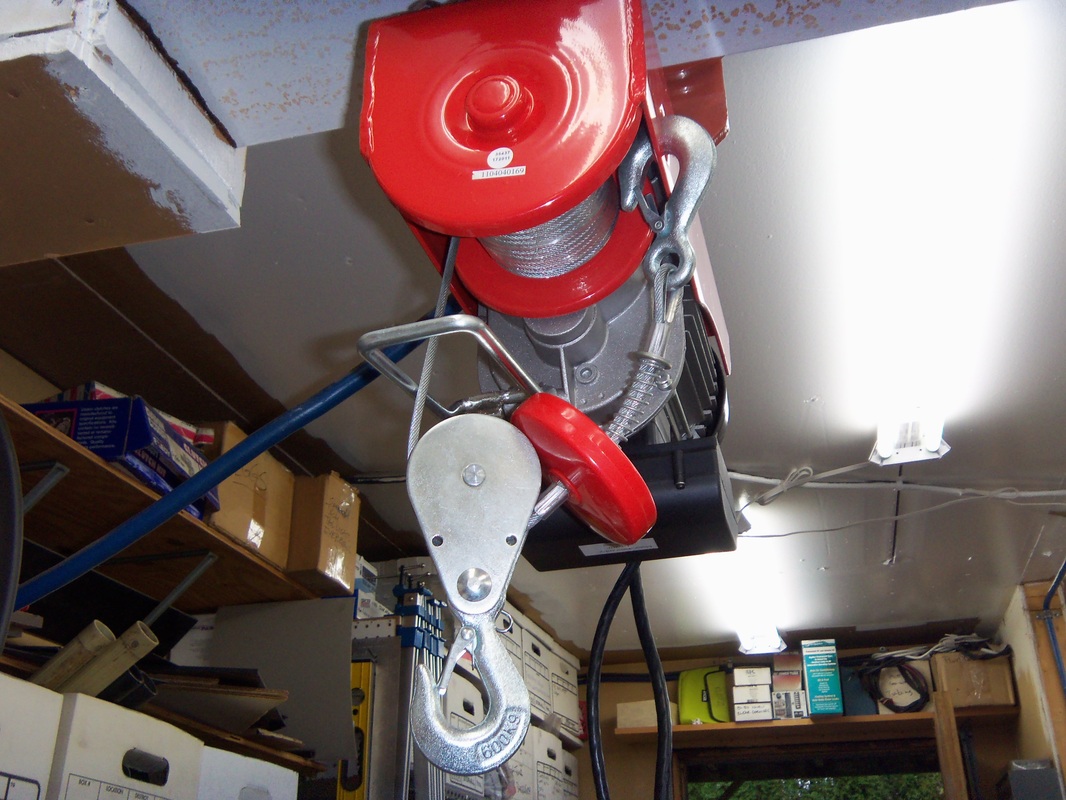
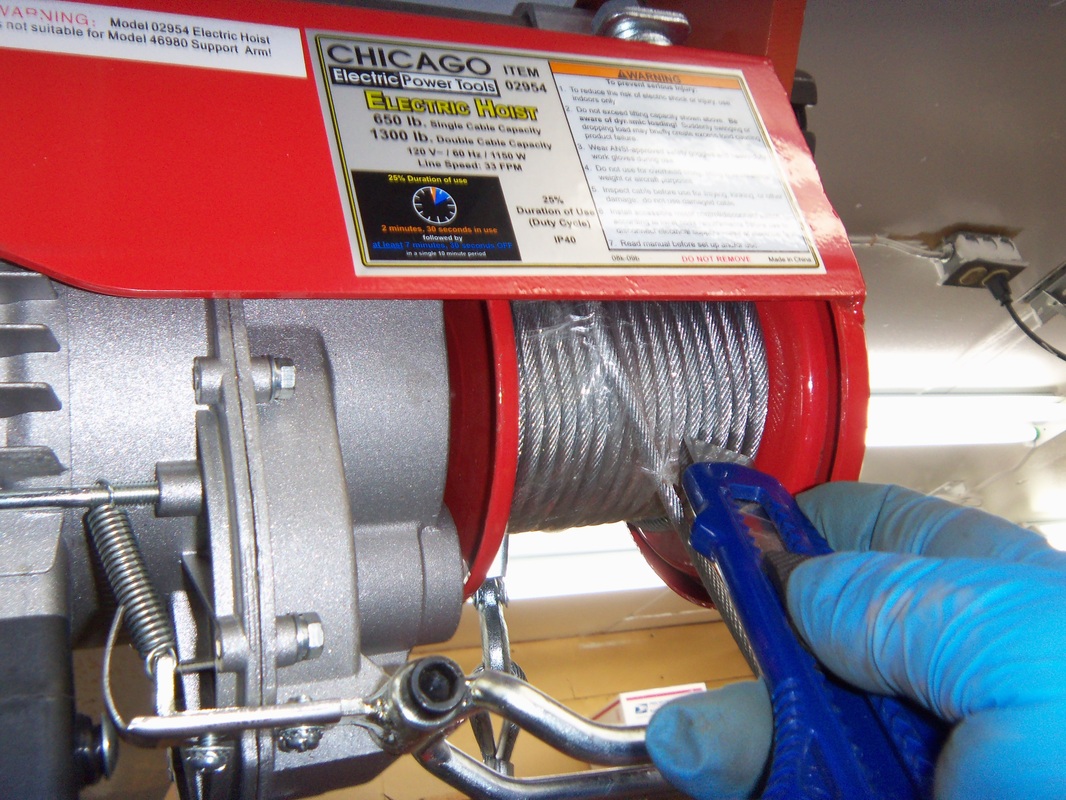
I did do a mock up on the bench to see if everything fit okay. I took it back apart to mount it to the beam. The trolley is the bigger pain to install. I managed by myself, but I'd highly recommend getting some help. You basically have to loosen the main bolt up to just a few threads holding the nut. Then, get one side up on the beam and then swing the second side up without pushing the first side back off. The trolley probably weighs a good 35lbs, so if it slips or drops, it's going to be loud.....probably not as loud as it will be if it drops on you, but be careful! Once the trolley was up, I snugged the nut down on the main bolt, but I did not tighten it until after the hoist was installed. I wanted the weight of the hoist to hold the square tubing in alignment. With the trolley in place, I was able to stand on a small ladder, cradle the hoist against my chest with one arm, then install the motor side bolts first. From that point, it was easy to get the other two bolts in with the washers. Then, using a cinch strap to hold up the motor, I removed the first two bolts and reinstalled them with the washers. With everything snug, I checked fit and alignment, then cranked everything down tight. If you're concerned with torque specs, you can look that up on the internet.....I simply made mine "gutentight". I installed the pulley/hook unit, the cut the tape off the spool so I could test it out.

That's pretty much it for the install. I'll put a couple of vids here so you can see it in action. The rest of the pics are on another page because they didn't seem all that necessary. I put them on a sub page to this one just in case they can help someone else. Misc HF Hoist Pics